Author: jcorcione

  • Galaxy Buds 3 Pro Worth It in 2026? Price, Specs & Verdict

    Galaxy Buds 3 Pro Worth It in 2026? Price, Specs & Verdict

    Galaxy Buds 3 Pro Worth It in 2026? Price, Specs & Verdict

    The Galaxy Buds 4 Pro just dropped at $250. Samsung’s previous flagship earbuds are sitting at $179 on Amazon right now. So is the Galaxy Buds 3 Pro worth it in 2026, or should you just pay up for the newer model?

    I’ve been watching this price drop for weeks. The Buds 3 Pro launched at $250 a year ago, and Samsung’s own successor just pushed them into clearance territory. That makes this a real decision point for anyone shopping wireless earbuds on a budget.

    What you actually get with the Galaxy Buds 3 Pro

    Quick spec rundown. The Buds 3 Pro pack a 2-way speaker setup with a dedicated tweeter and woofer in each bud. You get 6 hours of listening with ANC turned on, 7 hours with it off, and the charging case stretches that to 26-30 hours total. They’re IP57 rated, which means sweat and rain won’t kill them, but don’t take them swimming.

    Bluetooth 5.4 keeps the connection solid. Samsung’s Adaptive ANC adjusts noise cancellation based on your environment, and there’s a transparency mode that lets outside sound through when you need it. 360 Audio works with compatible Samsung phones for spatial sound, though honestly most people won’t notice the difference on Spotify.

    The fit is canal-style with silicone tips in three sizes. They sit flush and don’t stick out of your ears like some competitors. Comfortable for a couple hours straight, though fit is personal — some people love canal-style buds, others can’t stand them. Try before the return window closes.

    Is the Galaxy Buds 3 Pro worth it for the sound?

    Sound quality is where these earn their price. The dual-driver setup delivers clear mids and highs without the muddy bass that cheaper earbuds lean on to sound “premium.” Bass is there, it just doesn’t overpower everything else.

    Dolby Atmos support adds some width to the soundstage on Samsung devices. On a non-Samsung phone, you lose some of the AI sound optimization features, but the core audio quality holds up fine. I’d put them ahead of most earbuds under $200 for music clarity.

    Call quality is decent but not perfect. Multiple reports mention the mic cutting out mid-call or requiring a re-seat in the case to fix. Samsung pushed firmware updates to address it, and most users say the issue settled down after the first few patches. Still worth mentioning if calls are your primary use.

    ANC performance in the real world

    The noise cancellation on the Buds 3 Pro is genuinely good. Not Bose 700 good, but competitive with the AirPods Pro 2 in most environments. Coffee shop chatter, office HVAC hum, airplane cabin noise — it handles all of that without making your ears feel pressurized.

    Ambient mode works well too. You can carry on a conversation at a register or hear traffic without pulling the buds out. The switch between ANC and ambient is smooth, no jarring audio pop.

    Galaxy Buds 3 Pro vs Buds 4 Pro: the $70 question

    Here’s where the Galaxy Buds 3 Pro worth it question gets interesting. The Buds 4 Pro improved the driver setup with a planar tweeter and slightly better ANC. Sound quality is better, but it’s not a different league. More like going from a B+ to an A-.

    If you own a Galaxy S23 or newer, the Buds 4 Pro unlock features like UHQ lossless audio and head-gesture controls. Those are real perks. If you’re on an older Samsung phone or any other Android device, most of those extras don’t apply to you. You’re paying $70 more for incremental improvements you might not even hear.

    At $179 vs $250, the Buds 3 Pro are the smarter buy for most people. The sound is still excellent, the ANC is competitive, and that $70 stays in your pocket.

    What about compared to AirPods Pro 2?

    If you’re on iPhone, stop reading. Get the AirPods Pro 2. The ecosystem integration alone makes it the obvious pick.

    If you’re on Android, the Galaxy Buds 3 Pro win on value. Similar ANC performance, better price, and Samsung’s Galaxy AI features work if you’re in their ecosystem. The AirPods Pro 2 work on Android but lose most of their smart features. At that point you’re paying Apple tax for hardware that functions like basic Bluetooth earbuds.

    Known issues to watch for

    I want to be straight about the problems. Early production batches had quality control issues — uneven plastic gaps, charging pin burn marks, and silicone ear tips that tore too easily when swapped. Samsung paused shipping briefly to fix it.

    Most of the hardware defects traced back to units manufactured before October 2024. If you’re buying now in 2026, you’re getting later production runs where these issues were resolved. Check the serial number date if buying refurbished — avoid pre-October 2024 units.

    The Bluetooth disconnect-during-calls bug was a firmware issue. Updates fixed it for most users, but a few still report occasional drops. If hands-free calling is your main use case, test within the return window.

    Who should buy the Galaxy Buds 3 Pro in 2026

    The Galaxy Buds 3 Pro are worth it if you want solid ANC earbuds under $200 and you’re on Android. Samsung phone owners get the most out of them with Adaptive Sound and seamless device switching. Non-Samsung Android users still get excellent earbuds, just without the AI extras.

    Skip them if you need rock-solid call reliability, if you’re on iPhone, or if you already own the Buds 2 Pro and they’re working fine. The upgrade from Buds 2 Pro to 3 Pro is noticeable but not essential.

    At $179 with the Buds 4 Pro pushing the price down, this is the sweet spot. You’re getting 90% of Samsung’s best earbuds for 70% of the price. That math works for most people.

    Where to buy

    The Galaxy Buds 3 Pro are available on Amazon for around $179. Prices fluctuate, and I’ve seen them dip below $160 during sales. Samsung’s own store still lists them at $249, so Amazon is the move right now.

    If you’re looking at other budget-friendly tech picks, check out our roundup of the best budget multi-tools under $25 or the best keychain flashlight under $20.

    Disclosure: Tooled Out may earn a commission from purchases made through links on this page. This doesn’t affect our recommendations or the price you pay. We only link products we’d actually suggest to a friend.
  • Google App Widget Shortcuts: How to Add Sports, News and Weather to Your Home Screen

    Google App Widget Shortcuts: How to Add Sports, News and Weather to Your Home Screen

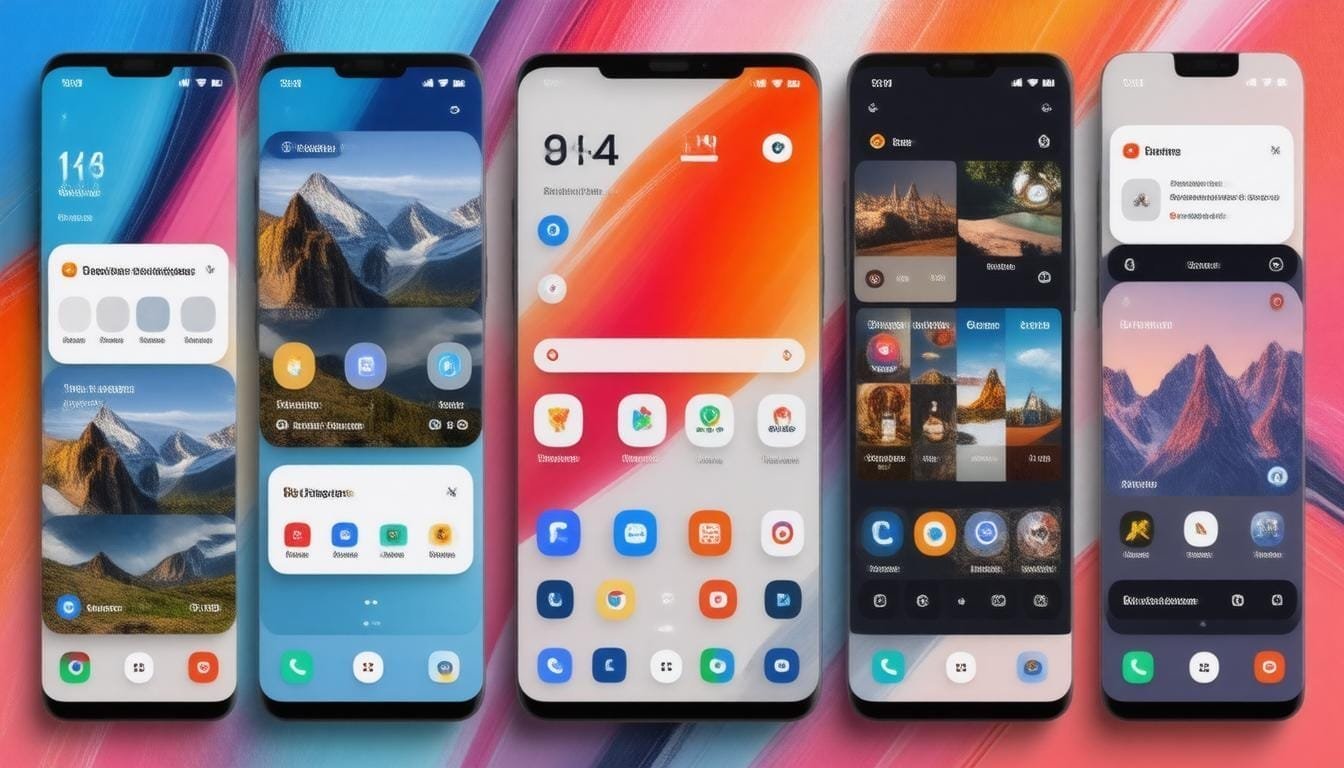
    Google updated the search bar widget on Android to support custom shortcuts for news, weather, sports, and other services. If you’re running version 16.3.34 or newer of the Google app, you can add a one-tap shortcut right next to the voice and Lens icons. Here’s how to set it up.

    Check Your Google App Version

    Open the Google app, tap your profile icon in the top right, then tap Settings > About. You need version 16.3.34 or higher. If you’re behind, update through the Play Store.

    Add a Shortcut to the Search Widget

    1. Open the Google app and tap your profile icon.
    2. Go to Settings > Search Widget > Customize Search Widget.
    3. Scroll to the Shortcuts section.
    4. Pick one shortcut: Weather, Sports, Translate, Finance, or News.
    5. The shortcut icon appears on the search bar widget next to Voice Search and Google Lens.

    You can only add one shortcut at a time. Swap it out anytime by going back to the same settings menu.

    Customize the Widget Appearance

    In the same Customize Search Widget screen, you can adjust:

    • Shape — rounded corners, pill shape, or rectangular
    • Color — match your wallpaper or pick a custom color
    • Transparency — make the widget blend into your background or stand out

    One limitation: shortcut icons don’t follow Material You dynamic theming. They keep their default Google colors regardless of your wallpaper palette.

    Add the Widget If You Don’t Have It

    If the Google search bar isn’t on your home screen already:

    1. Long-press an empty area on your home screen.
    2. Tap Widgets.
    3. Find the Google section and drag the search bar widget to your home screen.

    On Pixel phones, the search bar is pinned to the bottom by default and can’t be removed through normal settings. The customization options still apply — just access them through the Google app settings instead of long-pressing the widget.

    Check out our other article for 5 great methods for screenshots here 

    More Android tips: See the full Android Tips & Tricks hub for widget shortcuts, screenshot methods, the DND fix, Advanced Protection, and Scrcpy in one place.

  • 5 formas de hacer una gran captura de pantalla en Android (todos los métodos explicados)

    5 formas de hacer una gran captura de pantalla en Android (todos los métodos explicados)

    Android has at least five different ways to take a screenshot, depending on your phone brand and model. Here’s every method that works right now, from the universal button combo to Samsung-specific tricks.

    Method 1: Power + Volume Down (Works on All Android Phones)

    Press and hold Power and Volume Down at the same time for about one second. The screen flashes and a preview appears at the bottom. This works on every Android phone made in the last decade — Pixel, Samsung, OnePlus, Motorola, all of them.

    If your phone has a physical home button instead, use Power + Home.

    Method 2: Google Assistant Voice Command

    Say “Hey Google, take a screenshot.” The assistant captures whatever’s on screen. Useful when your hands are full or you can’t reach both buttons easily. Works on any phone with Google Assistant enabled.

    Method 3: Gesture Swipe (Pixel and Samsung)

    On Google Pixel: swipe up from the bottom of the screen to open the recent apps view, then tap Screenshot at the bottom.

    On Samsung Galaxy: swipe the edge of your palm across the screen from right to left. This needs to be turned on first — go to Settings > Advanced Features > Motions and Gestures > Palm Swipe to Capture.

    Method 4: S Pen Screenshot (Samsung Note/Ultra)

    Extrae el S Pen. En el menú Air Command, pulsa Screen Write. Captura la pantalla y te lleva a un editor donde puedes anotar antes de guardar. También puedes seleccionar un área específica con Smart Select en lugar de capturar la pantalla completa.

    Método 5: Captura de pantalla con desplazamiento (páginas largas)

    Haz una captura de pantalla normal usando cualquiera de los métodos anteriores. Cuando aparezca la vista previa en la parte inferior, pulsa el botón captura de desplazamiento (normalmente un icono de flecha hacia abajo). Sigue pulsándolo para extender la captura más abajo en la página. Esto captura páginas web enteras, hilos de chat largos o menús de configuración que no caben en una sola pantalla.

    Disponible de forma nativa en Android 12+. Los teléfonos Samsung lo tienen desde One UI 2.

    Dónde se guardan las capturas de pantalla

    Las capturas de pantalla se guardan en tu carpeta Screenshots en la aplicación Galería o Google Fotos. La ruta del archivo suele ser DCIM/Screenshots/ o Pictures/Screenshots/, dependiendo de la marca de tu teléfono. Puedes compartir directamente desde la vista previa de la captura de pantalla que aparece después de capturar, sin necesidad de buscar en tu galería.

    Extra: Grabación de pantalla

    ¿Necesitas vídeo en lugar de una imagen fija? Baja el panel de ajustes rápidos y pulsa Screen Recorder. Elige si quieres grabar audio (medios, micrófono o ambos) y luego pulsa Iniciar. Una cuenta atrás de 3 segundos te da tiempo para navegar a lo que quieres grabar. Pulsa la barra de notificaciones para detener.


    Echa un vistazo a nuestro artículo sobre La mejor estación de acoplamiento USB-C económica por menos de 50 $ (probada contra la basura)


    Por favor, apoya nuestras otras plataformas en Dot.Cards/Gigawerx

    ¡Realmente nos ayuda!

    More Android tips: See the full Android Tips & Tricks hub for widget shortcuts, screenshot methods, the DND fix, Advanced Protection, and Scrcpy in one place.

  • ¿No funciona el DND de un solo toque de Pixel? Aquí tienes la solución de 2 minutos (2026)

    ¿No funciona el DND de un solo toque de Pixel? Aquí tienes la solución de 2 minutos (2026)

    ¿No funciona el DND de un solo toque de Pixel? Aquí tienes la solución de 2 minutos (2026)

    Google cambió la forma en que funciona No Molestar en los teléfonos Pixel. Lo que antes era un solo toque en los ajustes rápidos, ahora requiere varios toques a través de un menú. Si eso te ha estado volviendo loco, aquí tienes dos maneras de recuperar el DND de un solo toque.

    Lo que Google cambió

    Una actualización reciente de Pixel reemplazó el interruptor rápido de DND con un acceso directo que abre un panel de ajustes en lugar de simplemente activar y desactivar DND. Probablemente Google hizo esto para que la gente configurara horarios y excepciones de DND en lugar de usarlo como un botón de silencio contundente. El resultado: algo que antes requería un toque, ahora requiere tres o cuatro.

    Solución 1: Instalar Simple DND

    Simple DND es una aplicación gratuita en Play Store que añade un verdadero interruptor DND de un solo toque a tu panel de ajustes rápidos.

    1. Descarga Simple DND de Google Play Store.
    2. Baja tu panel de ajustes rápidos y pulsa el icono del lápiz para editar los mosaicos.
    3. Encuentra el mosaico de Simple DND y arrástralo a tus mosaicos activos.
    4. Púlsalo una vez para activar o desactivar DND. Listo.

    Solución 2: Añadir DND a tu pantalla de bloqueo

    Si quieres que DND sea accesible sin siquiera desbloquear tu teléfono:

    1. Ve a Ajustes > Pantalla > Pantalla de bloqueo.
    2. Pulsa Accesos directos.
    3. Reemplaza uno de los accesos directos existentes en la pantalla de bloqueo con No Molestar.

    Ahora puedes activar DND directamente desde la pantalla de bloqueo con un solo toque.

    Dile a Google que lo quieres de vuelta

    If enough people complain, Google sometimes reverts these changes. Go to Settings > Tips & support > Send feedback and tell them you want the original one-tap DND toggle restored. Short, specific feedback works better than rants — just say what changed and why the old way was better.

    Help support us by visiging our other platforms Dot.Cards/gigawerx

    Read our latest article on   Android 16 Advanced Protection: What It Does and Who Needs It

    More Android tips: See the full Android Tips & Tricks hub for widget shortcuts, screenshot methods, the DND fix, Advanced Protection, and Scrcpy in one place.

  • Protección Avanzada de Android 16: Qué hace y quién la necesita

    Protección Avanzada de Android 16: Qué hace y quién la necesita

    Android 16 ships with an Advanced Protection Program that locks your phone down harder than most people need. It’s built for journalists, activists, and anyone whose phone holds information that could get them or someone else in trouble. Here’s what it does, what it breaks, and whether you should turn it on.

    What Advanced Protection Actually Does

    The program bundles several security features into one toggle. Once enabled, your phone enforces all of them at once:

    • Auto-reboot after 72 hours idle. If your phone sits untouched for three days, it reboots into a locked state where data is encrypted at rest. Useful if your device gets confiscated or stolen.
    • No unsecured Wi-Fi connections. The phone won’t connect to open networks without encryption. Blocks the most common man-in-the-middle attack vector.
    • App installs restricted to Google Play Store only. No sideloading APKs, no third-party app stores. Cuts off the main malware entry point on Android.
    • Enhanced Google Play Protect scanning. More aggressive malware detection runs on installed apps.
    • Scam call and message detection. Built-in fraud filtering flags suspicious calls and texts.

    How to Turn It On

    Go to Settings > Security & Privacy > Advanced Protection and follow the setup prompts. You’ll need a Google account with 2FA enabled. The whole process takes about two minutes.

    You can disable it later through the same menu if the restrictions don’t work for your daily use.

    Who Should Actually Use This

    If you handle confidential sources, work in a politically sensitive environment, or travel to places where your phone might be searched at a border crossing, this is worth enabling.

    If you sideload apps, use custom ROMs, or rely on APKs from outside the Play Store, Advanced Protection will break your workflow. The app restriction alone is a dealbreaker for power users who need apps Google doesn’t carry.

    For most people, standard Android security — a strong lock screen, 2FA on your Google account, keeping Play Protect on — covers the real-world threats you’ll face. Advanced Protection is the next tier up, and it trades convenience for hardening that only matters if you’re a specific kind of target.

    Read about One-Tap Do Not Distrub on Google Pixel.

    please supoort us on our other platfroes at dot.cards/gigawerx

    More Android tips: See the full Android Tips & Tricks hub for widget shortcuts, screenshot methods, the DND fix, Advanced Protection, and Scrcpy in one place.

  • Cómo controlar tu teléfono Android desde un ordenador con Scrcpy

    Cómo controlar tu teléfono Android desde un ordenador con Scrcpy

    Scrcpy te permite duplicar y controlar tu teléfono Android desde un ordenador con Windows, Mac o Linux a través de USB o Wi-Fi. Es gratuito, de código abierto y no requiere root. Aquí te explicamos cómo configurarlo y qué puedes hacer con él.

    Lo que necesitas

    • Un teléfono Android con Android 5.0 o posterior
    • Un cable USB (USB-C a USB-A o USB-C a USB-C)
    • Un ordenador con Windows, macOS o Linux

    Paso 1: Habilitar la depuración USB

    En tu teléfono, ve a Ajustes > Acerca del teléfono y pulsa Número de compilación siete veces. Verás un mensaje emergente que dice "Ahora eres desarrollador".

    Vuelve a Ajustes > Sistema > Opciones de desarrollador y activa Depuración USB.

    Paso 2: Instalar Scrcpy

    Windows: Instala a través de Scoop (scoop install scrcpy) o descarga el zip de la página oficial de lanzamientos de GitHub. Extrae y ejecuta desde la carpeta.

    macOS: Instala a través de Homebrew: brew install scrcpy

    Linux: La mayoría de las distribuciones lo tienen en el gestor de paquetes. En Ubuntu/Debian: sudo apt install scrcpy

    Paso 3: Conectar y ejecutar

    Conecta tu teléfono al ordenador mediante USB. Si se te solicita en el teléfono, pulsa Permitir en la ventana emergente de autorización de depuración USB. Marca "Permitir siempre desde este ordenador" si es tu máquina.

    Abre una terminal o símbolo del sistema y escribe:

    scrcpy

    La pantalla de tu teléfono aparece en una ventana en tu ordenador. Los clics del ratón se mapean a toques, la entrada del teclado se mapea al teclado del teléfono y puedes arrastrar para desplazarte.

    Indicadores útiles

    Scrcpy tiene opciones de línea de comandos que cambian cómo se ejecuta:

    • scrcpy --max-size 1920 — limita la resolución del espejo (reduce el retardo en máquinas más lentas)
    • scrcpy --turn-screen-off — duplica el teléfono pero mantiene su pantalla apagada (ahorra batería)
    • scrcpy --no-audio — omite el reenvío de audio si no lo necesitas
    • scrcpy --otg — usa el ratón y el teclado en el teléfono sin duplicar la pantalla
    • scrcpy --new-display=1920x1080 — crea una pantalla virtual con una resolución personalizada

    Conexión inalámbrica (sin cable)

    Conéctate primero por USB, luego ejecuta:

    adb tcpip 5555
    adb connect YOUR_PHONE_IP:5555

    Desconecta el cable, luego ejecuta scrcpy como de costumbre. La latencia es mayor por Wi-Fi, pero funciona bien para probar aplicaciones, responder mensajes y gestionar archivos.

    Nota de seguridad

    Descarga scrcpy solo del repositorio oficial de GitHub. Los sitios de descarga de terceros a veces incluyen malware. Desactiva la depuración USB cuando hayas terminado; dejarla activada da a cualquier ordenador al que te conectes acceso potencial a los datos de tu teléfono.

    Contáctanos para colaborar o escribir como invitado

    Echa un vistazo a nuestras otras plataformas aquí dot.cards/gigawerx

    More Android tips: See the full Android Tips & Tricks hub for widget shortcuts, screenshot methods, the DND fix, Advanced Protection, and Scrcpy in one place.

  • Cómo bloquear mensajes de estafa en iPhone con iOS 26

    Cómo bloquear mensajes de estafa en iPhone con iOS 26

    iOS 26 añadió un filtrado real contra estafas a la app Mensajes. Si te han bombardeado con alertas falsas de paquetes y enlaces de phishing —y estadísticamente, la mayoría de nosotros lo hemos hecho—, esto es lo que realmente cambió y cómo configurarlo.

    Qué cambió iOS 26 en Mensajes

    Apple añadió la categorización automática de mensajes. Tus textos ahora se clasifican en grupos: contactos conocidos, remitentes desconocidos y spam. La clasificación se realiza en el dispositivo, por lo que Apple no lee tus mensajes en un servidor.

    La categoría de spam hace tres cosas importantes:

    • Desactiva todos los enlaces y números de teléfono en los mensajes marcados. Literalmente, no puedes tocar un enlace de phishing por accidente.
    • Bloquea las respuestas a los mensajes de spam. Los estafadores usan las respuestas para confirmar que tu número está activo; esto lo detiene.
    • Silencia las notificaciones de remitentes desconocidos. No más pitidos durante la cena porque algún bot quiere tu número de la Seguridad Social.

    Cómo activar el filtrado de mensajes de texto de estafa

    Abre Ajustes > Mensajes > Desconocidos y Spam y activa Filtrar remitentes desconocidos. Eso es todo. Los mensajes de personas que no están en tus contactos se clasificarán automáticamente en la pestaña Remitentes desconocidos.

    Para la capa de detección de spam, asegúrate de tener iOS 26 o posterior. Ve a Ajustes > General > Actualización de software para comprobarlo. La categorización de spam se activa automáticamente una vez que tengas la versión correcta.

    Cuando los mensajes legítimos se marcan

    Sucede. Notificaciones de entrega de nuevos servicios, códigos de dos factores de aplicaciones en las que acabas de registrarte, mensajes de la consulta de un nuevo médico. Cualquier número desconocido puede acabar en la pila filtrada.

    Para recuperar un mensaje: abre la pestaña Remitentes desconocidos o Spam, busca el mensaje y toca Mover a la bandeja de entrada. El remitente se añadirá a la lista blanca en el futuro. Revisa esa carpeta filtrada cada pocos días hasta que estés seguro de que el sistema ha aprendido tus patrones.

    Lo que esto no soluciona

    El filtrado en el dispositivo no es perfecto. Los estafadores que suplantan a contactos conocidos todavía pueden pasar. El phishing de iMessage (donde alguien envía desde un ID de Apple, no un número de teléfono) también se cuela por el filtro de remitentes desconocidos. Mantente escéptico ante cualquier mensaje que te pida hacer clic en un enlace o compartir información personal, incluso de contactos.

    Para una protección adicional, informa de los mensajes de spam: mantén presionado el mensaje, toca Más y luego Informar de correo no deseado. Apple utiliza estos informes para mejorar el filtrado para todos.


    Read our artile on How to Control Your Android Phone from a Computer with Scrcpy

    Please support he site by visiting our pother platforms at Dot.Cards/gigawerx
  • The Best Budget Pocket Knife Under $30 (Tested Against the Junk)

    The Best Budget Pocket Knife Under $30 (Tested Against the Junk)

    Best Budget Pocket Knife Under $30:  Most pocket knives under $30 fall into one of two buckets: a real tool from a company that’s been making blades for decades, or a stamped-steel novelty that won’t hold an edge past the first box you open. The trick isn’t finding a knife under $30 — Amazon will show you ten thousand of them. The trick is finding one that’s actually worth carrying. Here are five that are, and what each one is actually for.

    Best Budget Pocket Knife: The short version

    Knife Street price Best for
    Ontario RAT II ~$25 Budget workhorse, hardest use for the money
    CRKT Drifter ~$20 One-handed opening, pocket clip
    Opinel No.08 ~$18 Food prep, light utility, ultralight carry
    Kershaw Shuffle ~$20 Multi-tool crossover, has a bit driver
    Case Peanut ~$30 Traditional slipjoint, no clip, heritage carry

    Ontario RAT II — the one that gets abused and keeps working

    The RAT II is what happens when a company builds a knife for hard use instead of for looking good on a table. AUS-8 steel isn’t fancy, but it’s easy to resharpen in the field, and the handle scales are grippy enough to use with gloves on. It’s a full-size blade in a budget knife’s price bracket, which is the whole appeal — you’re not paying for branding, you’re paying for steel and a lock that holds.

    The tradeoff: it’s not going to win a beauty contest, and the stock edge sometimes needs a touch-up before first use. Neither matters if this is living in a truck or a tool bag.

    [JOHN: your line — have you carried one of these, or is this the one you’d grab first?]

    CRKT Drifter — assisted opening without the assisted-opening price tag

    The Drifter opens fast with one hand thanks to CRKT’s spring-assist mechanism, and it carries flat with a reversible pocket clip. 8Cr13MoV steel won’t hold an edge as long as premium steel, but it’s easy to sharpen and cheap enough that you’re not sweating a lost knife. For a knife you’ll actually pull out of your pocket ten times a day, that fast one-handed open matters more than steel snobbery.

    Opinel No.08 — the one that’s actually good at cutting things

    Everything else on this list is built to survive abuse. The Opinel is built to cut — apples, rope, cardboard, packaging, whatever’s in front of you — and it does that better than knives twice its price. Carbon steel takes a scary-sharp edge; stainless trades a little of that for zero maintenance. Either way it’s light enough to forget you’re carrying it, which is the point.

    It’s not a pry bar and it’s not going to baton through firewood. That’s not what it’s for. If you want a knife that just cuts well, this is it.

    Kershaw Shuffle — the multi-tool knife

    The Shuffle folds a 2.6-inch blade, a bit driver, a bottle opener, and a flathead into one body, which makes it the closest thing on this list to the multi-tools we covered in the budget multi-tool roundup. If you want one thing in your pocket instead of two, this is the trade: you give up a little refinement on each function to get all of them in one place.

    Case Peanut — the one your grandfather would recognize

    No pocket clip, no assisted opening, no modern steel — and that’s the point. The Peanut is a two-blade slipjoint that’s been in continuous production for close to a century, made in the US, and small enough to disappear in a coin pocket. It’s not the knife you grab for hard use. It’s the one you carry every day for forty years because it never gives you a reason to replace it.

    Best budget pocket knife: what to skip

    Skip anything listing “440 stainless steel” with no country of origin or heat-treat info — that’s marketing language hiding a soft blade that won’t hold an edge past a week of real use. And skip liner locks under $15 with visible play in the blade when open; a lock that flexes is a lock that eventually fails when you need it. Every knife above comes from a company that’s been making blades long enough to stand behind a warranty.

    Best Budget Pocket Knife: FAQ

    What’s the best budget pocket knife for everyday carry?

    The Ontario RAT II if you want one knife that does everything reasonably well. The Opinel No.08 if cutting performance matters more than toughness.

    Are budget pocket knives durable enough for daily use?

    The ones on this list, yes. AUS-8 and 8Cr13MoV aren’t premium steels, but they’re proven, easy to sharpen, and used in knives that see real daily carry. The failure point with cheap knives is almost always the lock or the handle material, not the blade steel.

    Can I fly with a pocket knife?

    No — all five of these have a fixed blade over the TSA limit for carry-on. Check bags only, same as the Kershaw PT-2 we covered in the multi-tool guide.


    This post is part of our Best Budget EDC Gear Under `$50 guide — multitools, flashlights, and more.

    About the author: John Corcione has run IT and telecom projects for 15+ years, which mostly means he’s field-tested more gear than he’d like to admit — some of it great, most of it forgettable. Tooled Out is where he writes up what’s actually worth buying. Say hi or see what else he’s building at dot.cards/gigawerx.

  • The Best Budget USB-C Docking Station Under $50 (Tested Against the Junk)

    The Best Budget USB-C Docking Station Under $50 (Tested Against the Junk)

    Best Budget USB-C Docking Station: Most cheap docking stations fail the same way: they promise “12-in-1” or “16-in-1” and then choke the second you plug in two 4K monitors and a webcam at the same time. Port count on the box means nothing if the chipset behind it can’t push the bandwidth (the USB-IF specs matter more than port count). Here are five that actually hold up under a real remote-work setup, and what each one is actually for.

    Best Budget USB-C Docking Station: The short version

    Dock Street price Best for
    UGREEN Revodok Pro 7-in-1 ~$30 Single-monitor setup, best value
    Anker 555 USB-C Hub (8-in-1) ~$45 Dual USB-A peripherals, travel-friendly
    Baseus 10-in-1 ~$40 Ethernet + card reader combo
    Plugable USB-C Triple Display ~$50 Three monitors on a budget
    Dell WD19S (refurbished) ~$45 OEM reliability, single-cable laptop charging

    UGREEN Revodok Pro 7-in-1 — the one that just works for one screen

    If your setup is a laptop and a single external monitor, the UGREEN Revodok Pro is the easy call. It pushes 4K@60Hz over HDMI, delivers 100W power passthrough so your laptop charges while you work, and moves data at 10Gbps over its USB-A ports — fast enough for an external SSD without bottlenecking. It runs cool, which matters more than it sounds like it should; cheap docks that run hot are usually the ones that drop connections under load.

    [JOHN: your line — is this the one you’ve actually used for a home office setup?]

    Anker 555 USB-C Hub — the one built for people who still use wired peripherals

    Eight ports, including two USB-A slots for a wired mouse and keyboard, which a surprising number of budget docks skimp on in favor of extra USB-C. Anker’s build quality shows in the aluminum housing — it survives being tossed in a bag for travel better than the plastic docks in this price range. The tradeoff: single-display only, so it’s not the pick if you’re running dual monitors.

    Baseus 10-in-1 — the one with a real card reader

    Most budget docks bolt on an SD card slot as an afterthought that reads at a crawl. Baseus’s actually hits real UHS-I speeds, which matters if you’re offloading photos or video on the regular. It adds a gigabit Ethernet port too, which is the one spec worth paying attention to if your home WiFi is unreliable and you need a wired connection for video calls.

    Plugable USB-C Triple Display — the one that actually drives three monitors

    Most sub-$50 docks max out at one or two displays. Plugable’s DisplayLink-based dock pushes three, which is the whole reason to buy it. The catch: DisplayLink runs through software instead of native GPU output, so it adds a small amount of latency — fine for spreadsheets and email, noticeable if you’re doing anything graphics-intensive. Know what you’re trading before you buy it.

    Dell WD19S (refurbished) — the OEM dock that outlives the laptop it came with

    Buying refurbished OEM gear is the move nobody talks about in this category. The WD19S was Dell’s business-line dock, built for daily docking and undocking thousands of times without the port wearing out — a failure point on every cheap dock eventually. Refurbished units run close to budget-dock pricing and come with the reliability of hardware that was designed for a five-year corporate refresh cycle, not a one-year consumer warranty.

    Best budget USB-C docking station: what to skip

    Skip anything advertising “18-in-1” or higher under $40 — that port count usually means several ports are wired to the same internal controller and can’t run at full speed simultaneously. And skip docks with no listed power delivery wattage; if it doesn’t say how many watts it passes through to charge your laptop, assume it’s not enough for anything bigger than an ultrabook.

    Best Budget USB-C Docking Station: FAQ

    What’s the best budget docking station for a dual-monitor remote setup?

    The Plugable USB-C Triple Display if you need three screens, or two of the single-display docks above if you’d rather avoid DisplayLink’s software overhead and don’t mind the extra port.

    Can a budget USB-C docking station charge a laptop?

    The ones with listed power delivery wattage do — check for 65W minimum for most laptops, 100W if you’re running a larger workstation-class machine. Docks with no PD spec listed usually don’t charge, or charge too slowly to matter.

    Is a refurbished OEM dock actually reliable?

    Yes, more often than a new no-name dock. OEM docks like the Dell WD19S were built for corporate fleets that plug and unplug hundreds of times a week — the connectors and internal components are rated for it in a way most consumer docks aren’t.


    About the author: John Corcione has run IT and telecom projects for 15+ years, which means he’s set up more remote-work rigs than he can count — some of it great, most of it forgettable. Tooled Out is where he writes up what’s actually worth buying. Say hi or see what else he’s building at dot.cards/gigawerx.

    If you like this article, The Best Budget USB-C Docking Station under $30, check out  The Best Budget Keychain Flashlight Under $20 (Tested Against the Junk)

  • The Best Budget Keychain Flashlight Under $20 (Tested Against the Junk)

    The Best Budget Keychain Flashlight Under $20 (Tested Against the Junk)

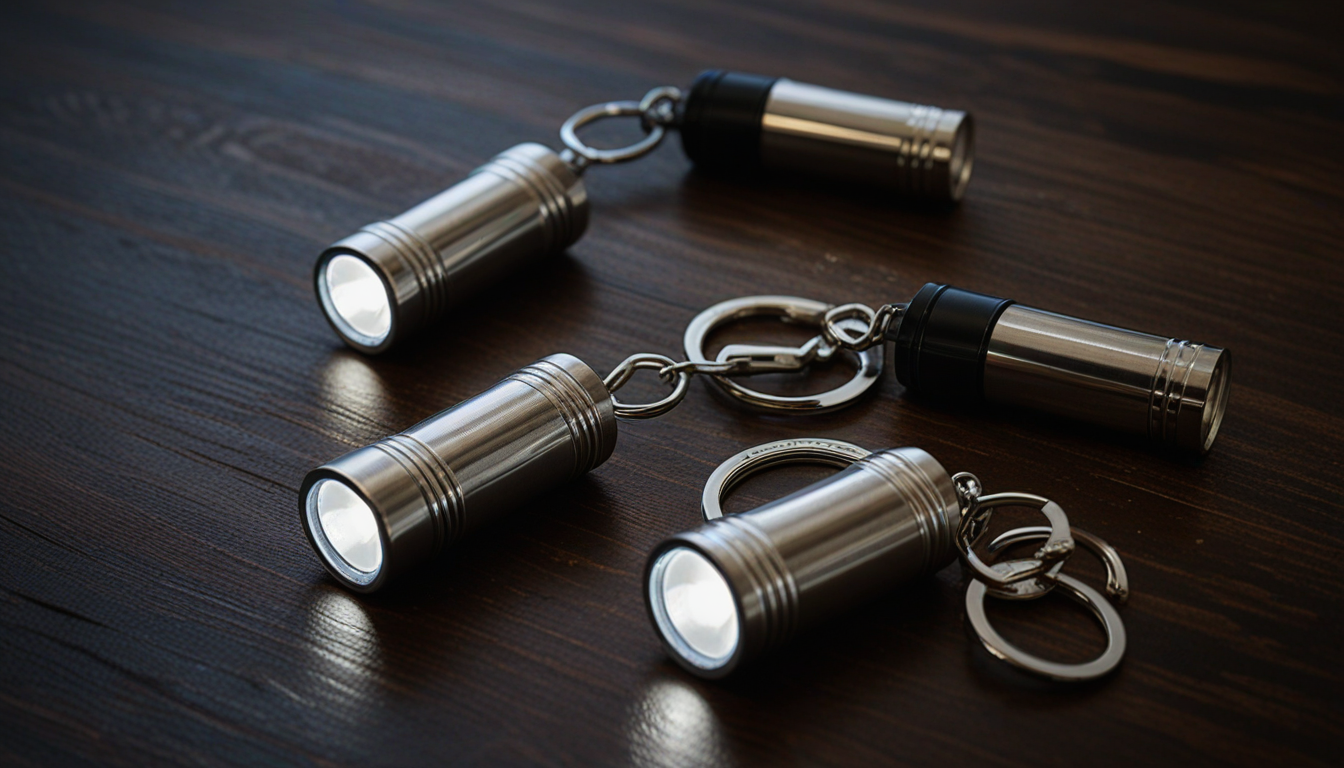
    Most keychain flashlights are a joke — a dim LED behind a plastic lens that dies in a drawer within a month. But a handful of them are genuinely useful: bright enough to actually see by, small enough to forget you’re carrying, and built to survive living on a keyring for years. Here are five worth carrying, and what each one is actually for.

    Budget Keychain Flashlight: The short version

    Light Street price Best for
    Nitecore TIKI ~$19 Rechargeable, brightest in this list
    Wuben G5 ~$20 USB-C rechargeable, budget powerhouse
    Streamlight Key Mate ~$12 Battery-swap simplicity, no charging cable to lose
    Pelican 1810 ~$12 Durability over brightness, drop it and forget it
    Hyper Tough Keychain LED ~$3 The $3 test — see if you’ll use one at all

    Nitecore TIKI — the brightest thing on this list, by a lot

    The TIKI pushes real lumens out of a body barely bigger than a car key fob, and it’s rechargeable over USB-C instead of eating coin cells. The stainless steel bezel takes the abuse of living in a pocket with keys and coins, and the button is easy to find one-handed in the dark, which matters more than it sounds like it should.

    I haven’t carried this exact one, but this is the pick I’d grab first — the brightness-to-size tradeoff is hard to beat at this price. If you want to see similar lights in hand, I keep a running showcase on TikTok Shop under @1jcorcione (Gadgetwerx).

    Wuben G5 — the budget rechargeable that punches above its price

    USB-C rechargeable, aluminum body, and enough output to actually light up a room instead of just a keyhole. The G5 undercuts the Nitecore on price and still holds its own on brightness. The tradeoff is fit and finish — it doesn’t feel quite as refined in hand — but for the price gap, that’s a fair trade for most people.

    Streamlight Key Mate — no cable, no charging, no excuses

    Not every light needs to be rechargeable. The Key Mate runs on a single coin cell, swaps in seconds, and never leaves you stuck because you forgot a cable. It’s dimmer than the rechargeable options here, but it’s also the one you’ll never find dead when you actually need it — no charge cycle to forget.

    Pelican 1810 — built like it’s going to outlive you

    Sixteen lumens doesn’t sound impressive next to the others on this list, and it isn’t — this one’s not about brightness. It’s about a solid aluminum body that shrugs off drops, water, and years of keyring abuse without the lens cracking or the switch failing. If you want the light that’s still working in a decade, this is it.

    Hyper Tough Keychain LED — the $3 experiment

    Buy this one first if you’re not sure you’ll actually use a keychain light. It’s cheap, it’s dim, and it won’t survive years of hard use — but if you find yourself reaching for it every week, that’s your sign to upgrade to something built to last. If it sits unused, you’re out three dollars instead of twenty.

    Best Budget Keychain Flashlight: What to skip

    Two things separate the useful ones from the junk drawer. Skip anything that doesn’t list an actual lumen count (measured per the ANSI/NEMA FL1 standard) — if the packaging just says “super bright” with no number, that’s a light that’s hiding something. And skip unbranded Amazon listings with a wall of identical five-star reviews posted the same week; that’s a pattern of incentivized reviews, not a reliable light. Every light above comes from a company that’s been making them long enough to stand behind a warranty.

    FAQ

    Are rechargeable keychain flashlights worth it over battery ones?

    Depends on your habits. If you’re diligent about charging things, rechargeable wins on brightness and long-term cost. If you’ll forget to charge it and need it to just work, a coin-cell light like the Key Mate is the safer bet.

    What’s the brightest budget keychain flashlight under $20?

    The Nitecore TIKI. It’s the clear brightness leader in this price range and still small enough to disappear on a keyring.

    How long do budget keychain flashlight batteries actually last?

    Coin-cell lights like the Key Mate or Pelican 1810 can sit for a year or more on standby before the battery needs swapping. Rechargeables need a top-up every few weeks of regular use, depending on how often you actually turn it on.

    I don’t have a personal favorite on my own keys yet, but I’m actively testing this category — check my TikTok Shop showcase (@1jcorcione, Gadgetwerx) for similar picks and real hands-on looks as I add them.

    if you enjoyed the article, check out The 5 Best Budget Multi-Tools Under $25 (No Junk, No Hype)

Verificado por MonsterInsights